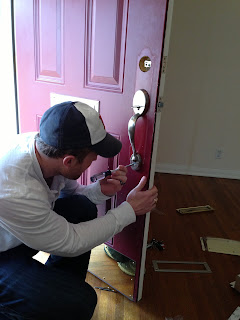
Once we got all the locks changed, we moved onto our second project - painting. All the colors in the house were super traditional - lots of creamy whites, peaches, etc. Not our style. Luckily, painting is one of those things that is an easy and inexpensive change that makes a big impact. Neither Tyler or I had actually ever painted a room, so we did some Googling and figured out exactly what we would need to get in order to get the job done. Here's our shopping list:
Paint rollers (two of each regular size, and baby size)
The fuzzy rollers to go with them
Paint roller extenders
Paint trays and liners
Brushes
Blue painters tape
Drop cloths
Paint
Our goal was to paint the family room, front living and dining room, master bedroom, and hallway leading to the master bedroom. We figured that those rooms would be easiest to get done without furniture and before we were moved in, and decided we could tackle the other rooms at a later time. I already knew I wanted to use Benjamin Moore paint. It is oil-based, and goes on so nicely. And I had stalked Houzz.com and some other websites for enough hours to figure out what colors I liked. Here's the breakdown and some examples of what the paint looks like (all BM paints):
- Master bedroom and front living/dining room: Coventry Gray
- Hallway leading to master bedroom: Sesame
- Family room: we'd paint the wood paneling and brick a BRIGHT white: Chantily lace; and then the back wall we'd paint with Sesame
 |
| Coventry Gray via |
 |
| Sesame via |
So here are our prep steps:
- Tape off all of the molding. We were planning on painting this later, but we didn't want to make a complete mess of it, so we taped it anyways
- Spackle any holes from nails
- Remove all electrical plates
- Put down drop cloths
Easy enough, right? Yup! We decided to start with the master bedroom. The room currently had carpet which we decided we were going to tear up and replace with wood floors. We wanted to get this one done first and then we'd continue with the same paint color in the front room. Here's a before and after:
 |
| Before |
 |
| After |
 |
| After |
So you can see, the grey makes such a big impact, I love it! You can also see we've torn up the carpet to prepare for our wood installation (its being installed today!) Stark white walls can make a big impression if done correctly, but as you can see, the sellers didn't really do a good job at that.
Once we finished the master, we moved on to the front room. Here is the 'Before' picture:
 |
| Before |
Gosh, I'm so glad we were able to look past all of their furniture selections and see the house for the cuteness that it really has! The wall color in the before pictures was a very light peachy color. And here is the after picture:
 |
| After |
Alright people. This is the same color that was in the master bedroom that I loved so much. But once we got it on the walls (meaning we painted the entire front room) I just saw problems with it and didn't love it in this room. The first problem was all I was seeing was blue! I don't know if it was the lighting or what, but to me, the paint looked like a light blue instead of a grey. And then secondly, there isn't a ton of lighting in this room so I felt like it was making the room too dark. Tyler was not pleased once I started voicing my concerns, but I was determined to repaint it. So that's what I did the next weekend. In this picture, you can see I have 6 paint samples on the wall. I ultimately chose the one on the top left corner, Benjamin Moore's Revere Pewter, because I felt like it didn't have the blue undertones I was seeing in the Coventry Gray, and it was also brighter, so it wouldn't make the room feel so dark. I recruited my bff Jamie, and we knocked this room out (with two coats of paint!) in just a few hours. Here is the revised After pic, and I really really really love the new color so much, I think I'm going to use it in the kitchen too:
 |
| After |
Also - please note that the wretched light fixture with the black shades will be going. I have a fabulous chandelier to replace it. :)
Next, the family room and hallway. I don't have before pictures of the hallway, but here is a before picture of the family room to refresh your memory:
 |
| Before |
 |
| After |
 |
| After |
 |
| After |
 |
| After |
We're really happy with how the paint came out. We feel like we're slowly bringing the house into the 21st century! I can't wait to get furniture into it!


